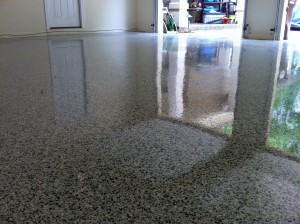
Epoxy Garage Concrete Floors Lake Ozark Stamped Acid Stained Coating Osage Beach MO Painted Floor
On this Garage Epoxy Floor Project we started by removing the existing flooring of an adhesive backed checker board linoleum, we started out prying and pulling at it but it was so brittle it was breaking off in small pieces, so I pulled out our handy air powered scraping tool, and it pealed it up like a hot knife would cut through butta!!……….more info under the Video.
Once all the tile was up we proceeded to grind the entire floor with our 95% dustless vacuum system this step was all completed within 2 days, we came back in the 3rd day and started mixing our Tan colored Epoxy resin, once the epoxy was all down, we moved to the next step of the process.
The next step was to toss on my spiked shoes quickly and grab my bucket of vinyl chips and get out there on the freshly laid down epoxy and toss my chips in the air (as you may have seen in the Video above).
once all the chips were thrown on top at 100% coverage, I had to take the rest of the day off, and resume the next day.
The last day, we started by scraping and brooming off any lose vinyl chips, clean it up real well. Then proceed to the mixing of the clear epoxy resin, once mixing starts its game on again!!
Once the Clear Epoxy was on, it was clean up time, because this Epoxy Garage Floor Project in Four Season Missouri was Complete!
Call me for a FREE Estimate.
OR – You can Fill out this Convenient Contact form located HERE and I will Contact YOU!!
Thank you for Visiting my Website, come back again soon….
Rick LaFata
(573)-216-0930
rick@customconcretedesign.info
Custom Concrete Design


